A 400-lb move

A 1938-built-house needs a 1930’s cast iron claw foot tub. The tiny, twisty stairs to the second floor wouldn’t allow us to haul it in the normal way, so scaffolding and pulleys and the ingenuity of a do-it-yourself handyman to the rescue! Here’s the stairway. Really, it was impossible to bring it in that way.DSC08809

So, it had to go in through the window before the window was installed. I was out of town, so I didn’t witness the 400-lb raising. Stephen said the pulley system carried the weight well on the haul up. The difficulty was maneuvering it through the window hole and carrying the weight of one side to the floor. And right inside that window the tub sat all through the construction phase, gathering saw and drywall dust for a year. DSC09657

We found the tub on Craigslist. It was in good shape, not perfect. That’s okay. We don’t want a perfect house, but a charming one. It passes for charming, not dingy. I painted the outside black and touched up the claw feet once the room was ready for it to be installed. in its final resting place.

DSC00485

Hopefully, the next owners won’t want to remove it. I think the only way to get it out is the same way it came in.

Front Steps Progress

My pictures of the concrete pour have disappeared. But, I can show you the almost-finished front steps, if you like.

DSC00482

We used concrete block to form the steps, and then poured the treads with forms. Stephen stuccoed the side walls. We stained all the finished concrete a dark charcoal.Honestly, I’m not crazy about the color. We were limited by color options. And if we’re feeling picky, neither Stephen or I like that we can still see the mudding lines between the block on the sides.

Even with the nit picking, it is wonderful having a finished step to walk up and down on. Are you noticing that they might be slippery? We applied a finishing product that makes the concrete grippy. I have slipped on them when I wear flip flops, so I’m not sure how great of a product it is.

You are going to have to use your imagination to visualize the tile on the risers yet to come. This might help. We are using a sister version of the mosaic as we used in the entry floor just inside the front door.

DSC06384.jpg

I think it will give me the cheery, colorful look I wanted without being too Spanish.

DSC00483withtile


Master Bath Addition

We are adding a bathroom to the second floor.

This is the space before. A wall is going where the long side of the rail is to form a bathroom. The bathroom will be where the clothes are in this shot. The entire sloped ceiling will be raised so that  all of the square footage can be utilized.DSC07031

While I was volunteering as a camp counselor during the summer one week, Stephen raised the roof and dried in the space for our bathroom. Here we are under construction. You can see the hand rail in both of the pictures to get idea of the space we are gaining by raising the roof. The future bathroom picture window will face the garage roof. So pretty, I know.

DSC08808.JPG

This is the main bathroom addition. We will be pulling a 1920’s cast iron clawfoot tub through that window in the future.

DSC08818

We also raised one side of the roof to gain more usable space in the bedroom. By changing the angle of the roof, we gain so much space inside!

DSC08812.JPG

This is the addition from the front of the house.DSC08821

From the back, with the bathroom addition.DSC09691

What a change, eh? From this…

DSC05551.jpg


Attic Master Suite

The second story of our house was unfinished attic space. I call it unfinished, but it was listed as a bedroom. Here is how the listing showed it. Does that look finished to you?

DSC05536

It was apparent from the old painting outlines, the space was divided into rooms at one point. We have had a few of the previous occupants stop by for a visit and tour, and they all assured me this was used as a bedroom. Before moving in, we raised the ceiling by a foot, installed a larger picture window, installed drywall and painted the floor. We lived in it this way for about two years.

Stephen’s biggest problem was the sloping ceiling that rendered 2 feet along the sides of the room, useless. Tall people only had the middle 6 feet to walk upright in. Shift to the right or left and you had to crook your neck. It wasn’t ideal.

DSC06028.jpg

The east-ish side window overlooking the back yard.

DSC06225

The west-ish window looking out on the front yard.

We railed in the hole in the floor that is the entry from the steps. The room was one big bedroom with no closet.

The vision is to turn the whole space into a master suite. Stay tuned.


New Front Steps

Its been a while (understatement, almost 3 years!!) since I updated our house progress. Our front steps were built to be short term until we could decide what we wanted: stone, poured concrete, brick? The wood we used for the temporary steps wasn’t treated, so after three years of use and a constant re-painting, it was time to decide what we wanted so we could finish the entrance.

WP_20130705_005

The temporary wood steps.

I new I wanted some sort of tile work, but was hesitant to make it too Spanish.

After looking at many tiled stairs images, I decided it was the brick or Terra-cotta that gave it the Spanish flair, and I could use a colorful tile riser if I had a different medium for the tread. My husband was leaning toward pouring concrete, so I began to research Brownstones. This image brings together all the elements I was looking for.

I appreciate the lip on the concrete tread and even the little bit of trim flair on the underside.

We knew we wanted iron rail, but will wait to add that as the budget allows. I love the look of the old iron.

So, the new steps begin!

WP_20150713_004

A circle of cobbles

We needed a front patio to control the mud coming in the front door.

WP_20130525_012

I am so thankful for a meticulous husband. He has this patio perfectly level, with a slight slope. WP_20130525_014

Instead of laying sand and chipped gravel, we tried the soft underlayment mats. They are square, and piece together to form any shape you need. Easy to cut, easy to install.WP_20130525_015
We had to use 2 circle kits from VillaStone made by Abbotsford Concrete Products.

WP_20130705_008

Eventually (My! I use that word a lot…we have lots of plans, but limited time.), we will extend the cobbles to landscape the driveway and side of the house.

WP_20130705_005

It is gratifying to take a look back at how we started. Here it is in April, 2012.

DSC05528

In August or September, 2012.DSC06735
And now. We also jack-hammered out the old concrete steps that led to the original front door on the side. (Under that window) Stephen was installing the siding to finish it off. Now, I get to decide what plants to put there!
WP_20130705_007

Garden show off

I didn’t have a garden last year because of the remodel work. It was killing me! This garden plot was a weed area for the previous owner. It was covered in comfrey (devil weed), dandelions, butterfly bushes, poppies and morning glories. A few redeeming factors: This arch is now covered in Marion berries. The site gets FULL sun. It tucks in perfectly between the grape arbor and back lawn. arch

I couldn’t wait to start planning this year, and started to design and till the soil in March. Of course, a full till of the soil cut all the morning glory vines into millions of little vines that I will battle until kingdom come, but it needed one good till. We won’t till it again, instead use cover crops to work the soil each year.

WP_20130316_001

This is the progression from my kitchen window. I laid black plastic between the beds for weed control on the paths. I am using raised beds without boxes. We just piled up the dirt high for the beds and lower for the paths.

WP_20130321_001

Wood chips lay over the plastic. By April things were starting to green up.

WP_20130509_001

I have a bed of potatoes under the straw bed right by the arch. I’ve failed at getting a good crop from potato towers, so I’m trying the old-fashioned way of piling up straw around the plants.

WP_20130602_001

By June we were swimming in lettuce and the beans are to the tops of the teepees!

WP_20130628_001Time for the carrots and first planting of lettuce to come out to make way for the tomatoes.

WP_20130628_003


Dining Chairs Mish-mash

Chair style 1

I prefer my  things don’t match. I like them to complement, but not be identical. So goes my dining chairs. I found two chairs for $15 each at a second-hand store. They had more, but again, no matchy-matchy for me!

DSC07189

The arms were scratched or chewed up by a critter, so I sanded and re-stained them.

DSC07190I thought the details, the knobs and crosses on the back, went great with my table. New cushions and fabric make them perfect.

WP_20130705_003

Chair Style 2

This little guy I found at an estate sale up the road. It was $1.

WP_20130301_001
Sanded it. Taped the wood off. Painted the metal a flat grey. (Yes, Eleanor, grey again!) Stained the wood walnut. Wa-laa!
DSC07326

Chair Style 3

These chairs, I picked up for $3 apiece. Man, they were musty. I don’t have a before picture, but the original fabric was a heavy mustard upholstery. I was thrilled that the wood matched my other chairs, and even the details were mimicked. Not exact, but similar.

chairI used the same fabric, and encored the pillow fabric on the back.WP_20130628_006

Now to find a two-person settee, and my set will be complete.

Dining Table Makeover Adventures

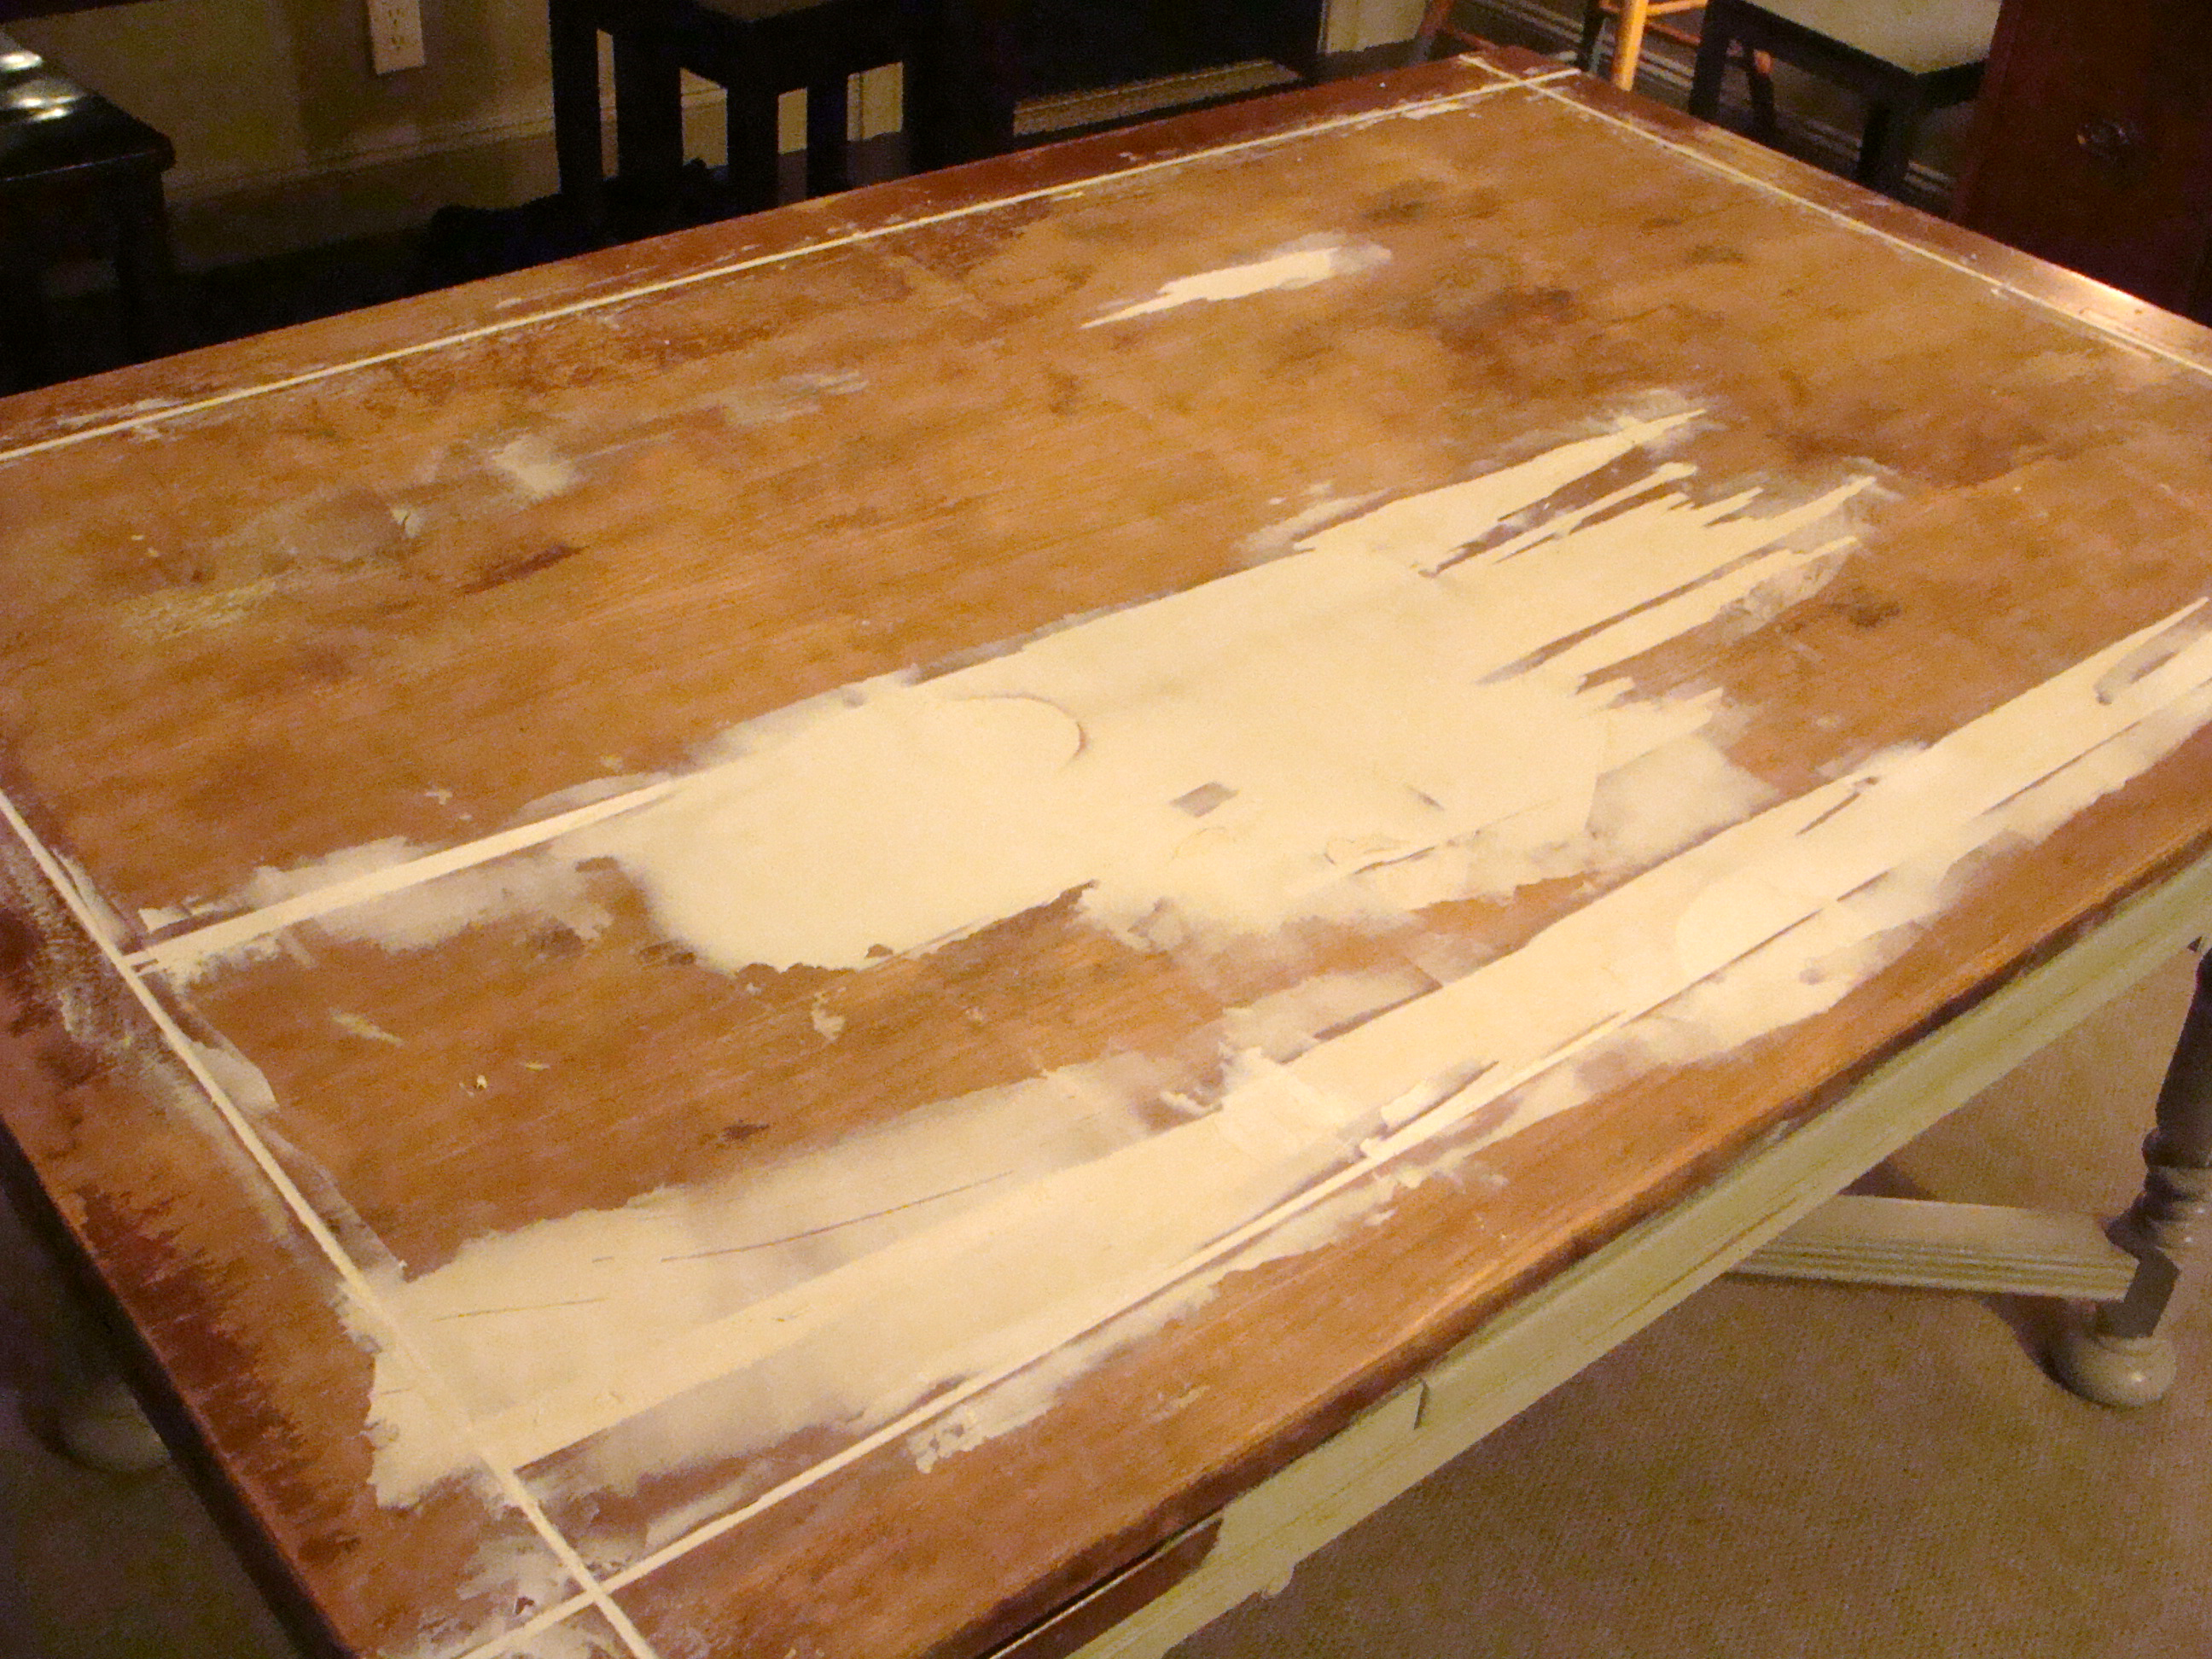
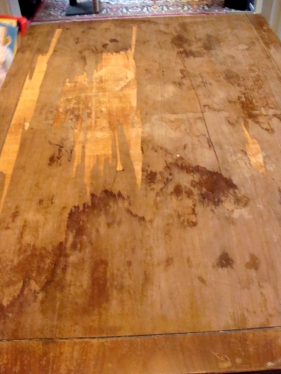
Last January, I found a vintage table listed on Craig’s List for $200. It was just what I’d been looking for: ornate legs, hide-a-table extenders that slide in and out, and casters. The listing said it was in fair condition. One leg was missing a chunk and the veneer on the top was peeling and in terrible shape. But, it was sturdy.

DSC07149
DSC07148I went to see it. Loved it. Made a deal to purchase it for $150, and then worried about spending too much for a peeling piece of junk. You know how that goes.
DSC07145

DSC07168

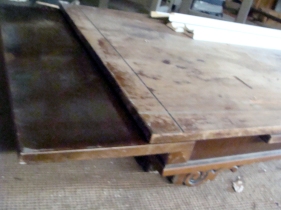
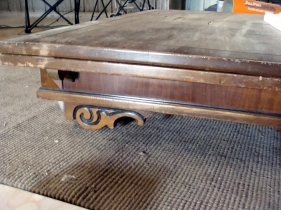
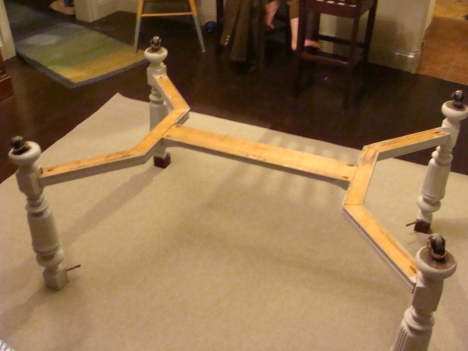
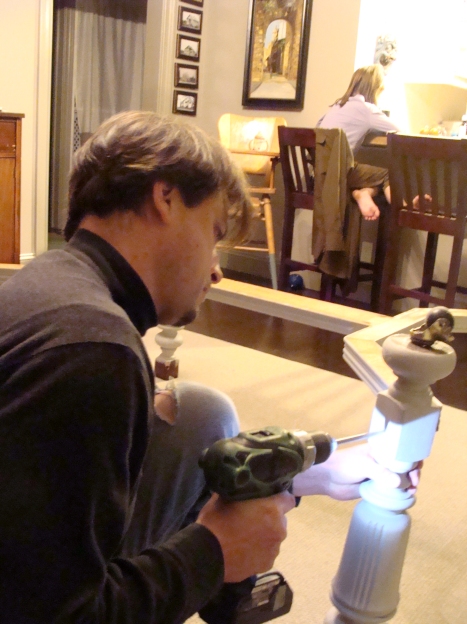
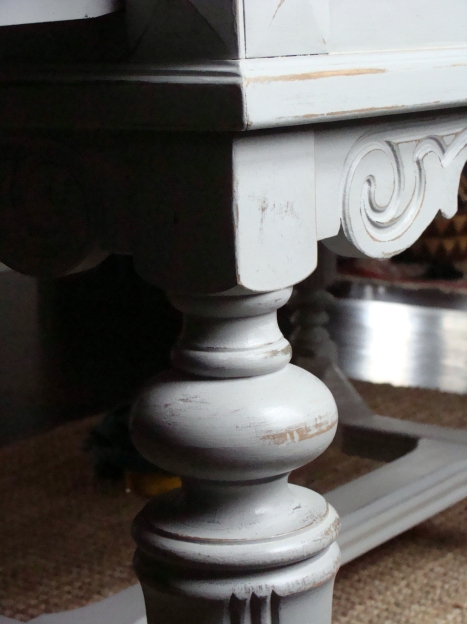
After experimenting with a few chairs, we decided the casters made the table too high. We removed them. Stephen squared up the legs, tightened screws and added a few more to make the leg support arch more stable.
DSC07165

DSC07167

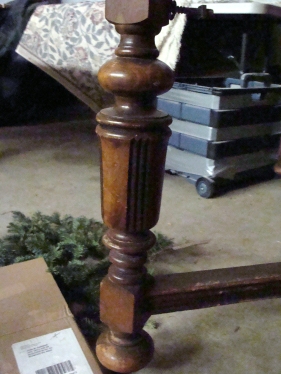
I painted the legs Annie Sloan’s Paris Grey.

“Grey. Again?” My daughter asked.

“Yes, Eleanor. I want to marry the color grey.” DSC07151
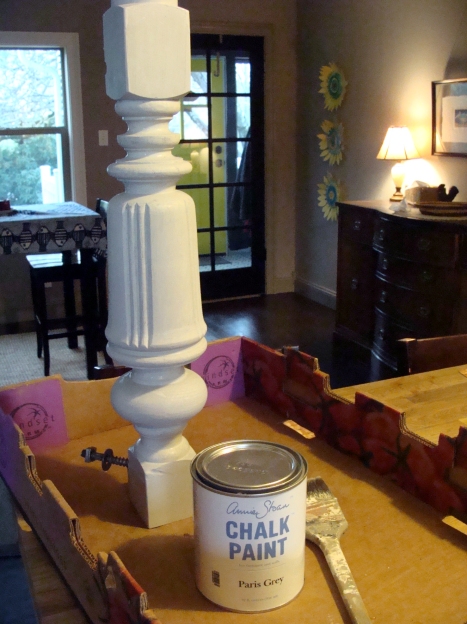
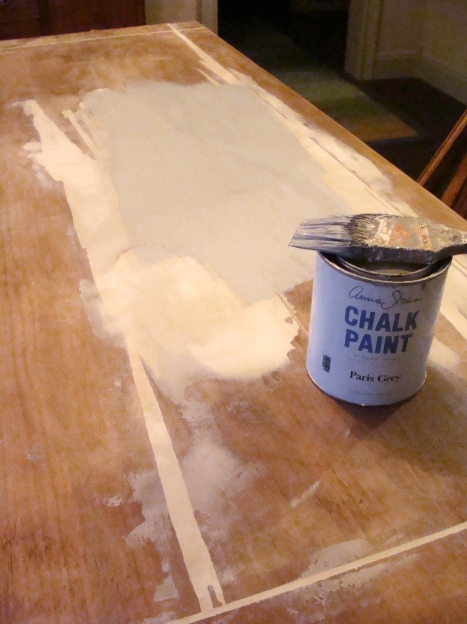
After researching for hours on how to apply veneer, where to buy veneer, and how much it would cost; I decided NOT to re-du the veneer. I found one lonely forum entry by a professional furniture restorer explaining how he uses hardener epoxy to re-build damaged molding on antique pieces. It seemed easy enough. And it finishes smooth and very hard. I used 3Ms all-purpose filler. I peeled away all the loose veneer I could, sanded and then applied the epoxy- like drywall compound  -on the missing parts. Sand it smooth and repeat. Level and smooth. I’m not a perfectionist. I figured my kids would be slowly destroying the table for the next 10 years, so I wasn’t going to make myself crazy getting it perfect.

DSC07174

More Chalk Paint. More sanding. More compound epoxy. More sanding. More paint.

DSC07176

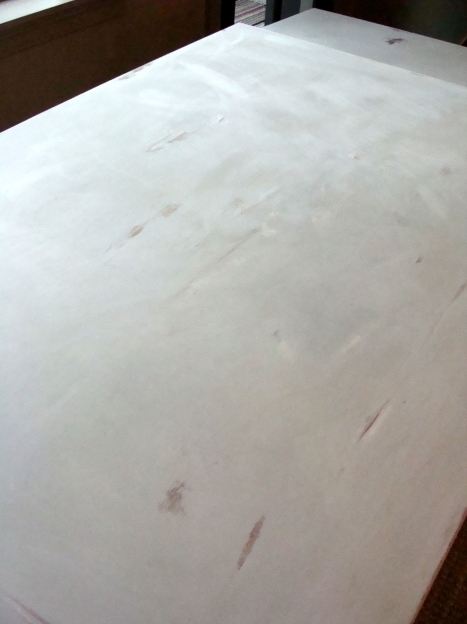
When I painted, the veneer sucked in the moisture, and started to pop up in places. I used a sharp syringe and watered-down wood glue to stab adhesive into the air bubbles. Then, I pressed it down with books and bench press weights overnight.  That works, but it is a tedious process.

DSC07187More sanding to shabby it up. Then paste wax and a good polish.

DSC07182

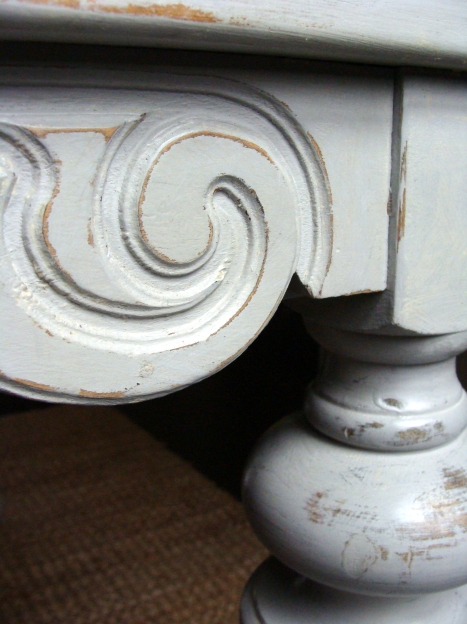
I can’t say enough good things about Annie Sloan’s Chalk Paint. It is a dream to work with. After applying wax, it hardens and shines beautifully.

DSC07181

After using the table for a few months, the veneer will still pop up in tiny places when I wipe it down or a it gets wet. Once it dries, it lays flat again. Having a painted table top was not my first choice, but I don’t hate it.

WP_20130523_005

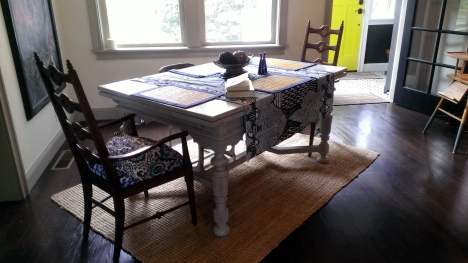
I love the way it looks, but its not the most comfortable to sit at. The scrollwork rubs our legs when we sit two to a side, and it stops the chair arms from tucking under. I’ll detail the chairs I re-did in a following post.

I still debate whether $150 (plus $100 for paint and epoxy) was a good deal for it. Hmmm. What do you think?

Bath Trim is Done!

Here’s some pictures as proof.

DSC07135 DSC07136 DSC07141 DSC07142